Banana bread recipe 2 bananas explained step by step
Table of Contents
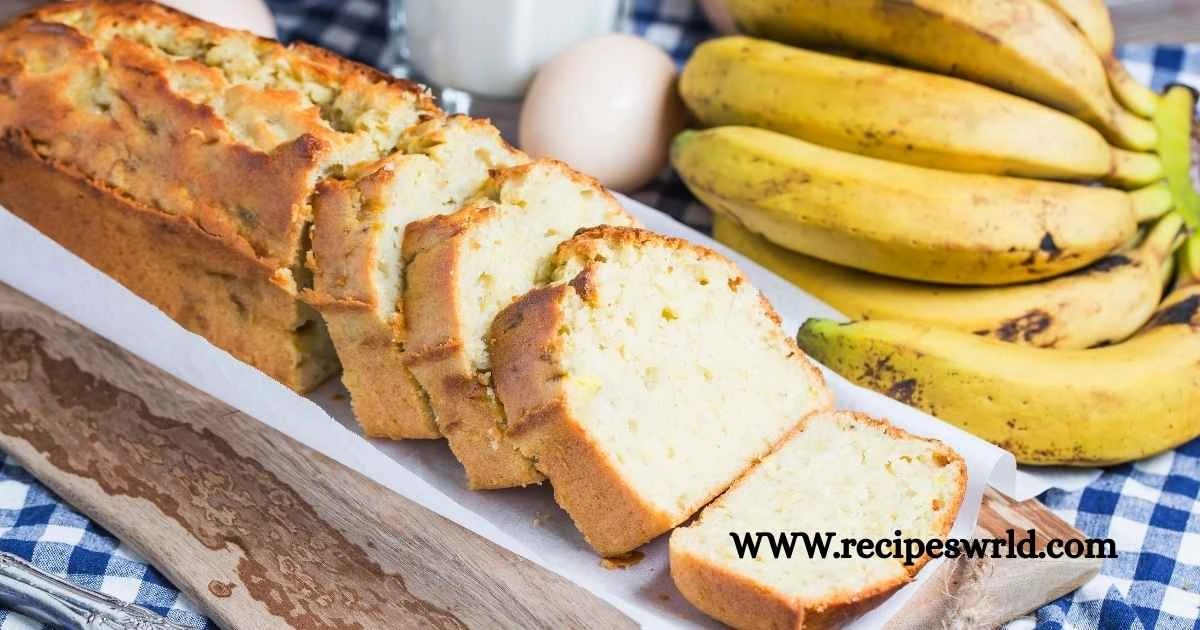
Perfect Banana Bread Recipe with 2 Bananas: A Simple Guide to Moist, Delicious Homemade Bread
Picture this: you’re standing in your kitchen, staring at two bananas that have seen better days. Their peels are dotted with brown spots, and you’re wondering whether to toss them or give them one last chance at glory. Here’s what nobody tells you—those imperfect bananas are actually your secret weapon for creating the most incredible homemade bread you’ve ever tasted.
I get it. You’ve probably scrolled past dozens of complicated recipes that call for four or five bananas, leaving you stuck when you only have a couple lying around. The frustration is real, especially when that baking craving hits and you don’t want to make a grocery run. But what if I told you that this limitation is actually your advantage? This banana bread recipe with 2 bananas delivers concentrated flavor, perfect moisture, and that nostalgic taste that reminds you of grandmother’s kitchen—all without requiring a basket full of fruit.
Let’s transform those two humble bananas into something extraordinary.
Why This 2 Banana Bread Recipe Works Every Time
You might wonder whether two bananas can really produce a full-sized loaf worth eating. The answer is a resounding yes, and here’s why the math works beautifully in your favor.
Two medium-to-large ripe bananas yield approximately one cup of mashed fruit—precisely the amount needed to create optimal moisture without turning your bread into a soggy mess. Think of it like the Goldilocks principle: not too wet, not too dry, but absolutely perfect.
The concentrated banana flavor becomes more pronounced when you’re not diluting it with excessive fruit. You’ll taste every nuance of that sweet, caramelized banana goodness in each bite. Plus, this approach saves you money and reduces food waste, which feels surprisingly satisfying in our increasingly conscious world.
What sets this recipe apart from others cluttering your Pinterest board? Simplicity. You won’t need a stand mixer, fancy equipment, or culinary school credentials. Just a bowl, a fork, and your own two hands. The entire process takes less than an hour from start to finish, including baking time. Your kitchen will smell like heaven, and you’ll have warm, tender slices ready before your coffee gets cold.
Gathering Your Ingredients for Success
Before you start mixing anything, let’s talk about what you’ll need. Having everything measured and ready—what professional bakers call “mise en place”—makes the process smoother and more enjoyable.
Here’s your complete shopping list:
| Ingredient | Quantity | Important Notes |
|---|---|---|
| Ripe bananas | 2 medium-large | Brown spots are your friends here |
| All-purpose flour | 1½ cups (190g) | Spoon and level for accuracy |
| Granulated sugar | ¾ cup (150g) | Brown sugar adds deeper flavor |
| Large egg | 1 | Room temperature blends better |
| Melted butter | ⅓ cup (75g) | Can substitute with oil |
| Baking soda | 1 teaspoon | Check expiration date |
| Salt | ¼ teaspoon | Balances sweetness |
| Vanilla extract | 1 teaspoon | Pure extract tastes superior |
| Ground cinnamon | ½ teaspoon | Optional but recommended |
Want to customize? Fold in half a cup of chocolate chips for richness, chopped walnuts for crunch, or a quarter cup of Greek yogurt for extra moisture. Think of the base recipe as a starting point you can adapt any way you like.
Step-by-Step Instructions for Banana Bread with 2 Bananas
Setting Up Your Workspace
Start by preheating your oven to 350°F (175°C). This temperature is non-negotiable—too hot and you’ll burn the outside while leaving the center raw; too cool and you’ll end up with dense, gummy bread.
Grab your 9×5 inch loaf pan and give it a generous coating of butter or cooking spray. Better yet, line it with parchment paper for foolproof removal later. Trust me on this—there’s nothing more heartbreaking than having your perfect loaf stick to the pan.
Mashing Your Bananas Like a Pro
Peel those two spotty bananas and place them in your largest mixing bowl. Now comes the therapeutic part: mashing. Use a sturdy fork and press down firmly, scraping the bowl’s sides as you go. You want mostly smooth consistency with a few small lumps remaining—these little pockets of banana create delightful bursts of flavor throughout your bread.
The riper your bananas, the easier this step becomes. If your bananas have turned completely brown (not moldy, just brown), celebrate! Those are flavor gold. The brown spots indicate converted starches that have transformed into natural sugars, making your bread sweeter without adding extra sugar.
Combining Wet Ingredients
Pour your melted butter over the mashed bananas and stir vigorously. Watch as the mixture becomes glossy and emulsified. Add your sugar next, stirring until everything looks unified and slightly fluffy—about 30 seconds of good arm workout.
Crack your egg into a small bowl first (nobody wants surprise shell pieces), then beat it into your banana mixture. Finally, splash in that vanilla extract. The aroma at this stage alone is worth the effort.
Preparing Your Dry Ingredients
In another bowl, whisk the flour, baking soda, salt, and cinnamon until well combined—this step is more important than it may seem. Clumps of baking soda can create bitter pockets in your finished bread, while evenly distributed leavening gives you that perfect rise and tender crumb.
Some bakers skip this step and dump everything together. Don’t be those bakers. The extra thirty seconds pays dividends in texture and taste.
The Critical Mixing Stage
Here’s where many home bakers unknowingly sabotage their results. Pour your dry ingredients into the wet mixture, then—and this is crucial—mix only until you no longer see dry flour streaks. A few lumps? Perfectly fine. Still see some flour? Keep folding gently. Everything completely smooth? You’ve gone too far.
Overmixing develops gluten strands, which belong in chewy bread but have no business in tender quick breads. Think of your batter like you’re folding delicate laundry, not beating carpet dust. Gentle, purposeful movements win the day.
If you’re adding chocolate chips or nuts, fold them in at this stage with just a few more strokes.
Baking to Golden Perfection
Pour your batter into the prepared pan, using your spatula to smooth the top and push batter into the corners. Slide it into your preheated oven’s center rack—positioning matters because heat rises, and the center offers the most consistent temperature.
Set your timer for fifty minutes, then resist every urge to open that oven door. Each peek releases heat and can cause your bread to sink in the middle. Around the forty-five-minute mark, you’ll start smelling the intoxicating aroma of baking banana bread. Stay strong.
At fifty minutes, perform the toothpick test. Insert a wooden toothpick or thin knife into the bread’s center. It should emerge clean or with just a few moist crumbs clinging to it. Wet batter? Give it another five to ten minutes. The top should be deep golden brown, and when you gently press the surface, it should spring back.
Cooling and Serving
This might be the hardest part: waiting. Let your bread rest in the pan for ten full minutes after removing it from the oven. This cooling period allows the structure to set, preventing crumbling when you turn it out.
Run a knife around the edges, then invert the pan onto a wire rack. Peel away the parchment paper if you used it, then flip the bread right-side up. Let it cool for at least fifteen more minutes before slicing—though waiting until completely cool yields the cleanest, most beautiful slices.
Serve your banana bread warm with butter melting into each slice, or let it cool completely and toast slices the next morning. Both experiences are equally divine.
Troubleshooting Common Issues
Your banana bread turned out dense instead of fluffy? You likely overmixed your batter or your baking soda has expired. Baking soda loses potency over time, so if you can’t remember when you bought that box in the back of your pantry, grab a fresh one.
Bread sank in the middle? This happens when you open the oven door too early, use too much liquid, or bake at incorrect temperatures. Invest in an oven thermometer—you’d be surprised how many ovens run hot or cold.
Top burned while the inside stayed raw? Cover your bread with aluminum foil halfway through baking to protect the surface while the center finishes cooking.
Storing Your Masterpiece
Wrap your completely cooled bread tightly in plastic wrap or aluminum foil. It’ll stay fresh at room temperature for four days, in the refrigerator for a week, or in the freezer for three months. For freezer storage, add an extra layer of foil over the plastic wrap to prevent freezer burn.
Pro tip: slice your bread before freezing, then you can toast individual pieces straight from frozen—perfect for those mornings when you need something quick and comforting.
Frequently Asked Questions About Banana Bread Recipe 2 Bananas
Can banana bread be made with only two bananas?
Absolutely! This banana bread recipe with 2 bananas is specifically designed to work perfectly with just two medium-to-large ripe bananas, giving you ideal moisture and concentrated flavor.
What if my bananas aren’t ripe enough?
Place them in a paper bag for one to two days, or bake unpeeled bananas at 300°F for fifteen to twenty minutes until the skins blacken. Let them cool, then use as normal.
How do I know when my bread is done?
Insert a toothpick into the center; it should come out clean or with only a few moist crumbs attached. The internal temperature should reach 200°F.
Why is my banana bread too dry?
You’ve either overbaked it, used too much flour, or didn’t use ripe enough bananas. Measure flour by spooning it into your measuring cup rather than scooping directly from the bag.
Your Turn to Bake Something Beautiful
You now hold the blueprint for creating exceptional banana bread with just two bananas—no more excuses about not having enough fruit or needing complicated ingredients. This recipe respects your time, your budget, and those imperfect bananas that deserve a second chance at greatness.
The next time you spot those brown-speckled bananas on your counter, you’ll feel excitement instead of guilt. You’ll have clear, simple steps to follow, and in under an hour, your kitchen will be wrapped in a cozy, inviting scent that instantly makes your house feel like home.
So grab those bananas, preheat that oven, and get ready to impress yourself. After you’ve baked your first loaf, come back and share your experience—did you add chocolate chips? Try the whole wheat variation? Toast it for breakfast? Your fellow bakers want to know, and your success story might inspire someone else to give those two lonely bananas their moment to shine.