How to Cook Brisket in Oven for Perfectly Tender Results
Table of Contents
How to Cook Brisket in Oven: The Ultimate Beginner’s Guide to Melt-in-Your-Mouth Perfection
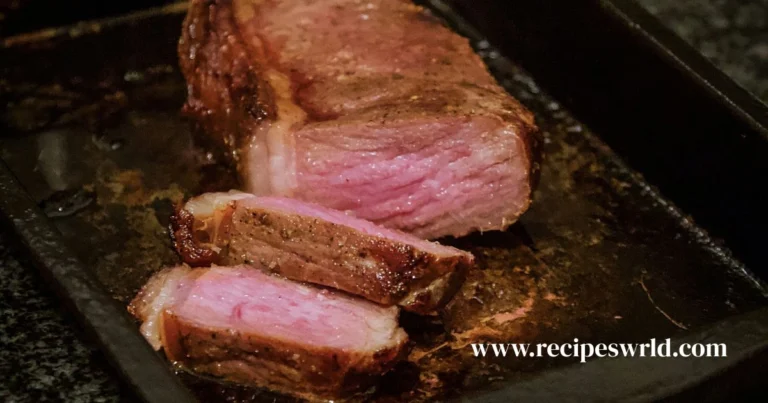
Picture this: You’re standing in your kitchen, the rich aroma of slow-cooked beef wafting through every room. Your family gathers around the table, eyes widening as you slice into a perfectly tender brisket that practically falls apart at the touch of your knife. That moment of pride? It’s closer than you think.
Maybe you’ve walked past the meat counter dozens of times, eyeing that intimidating slab of beef and wondering if you could actually master it. Here’s the truth: learning how to cook brisket in oven doesn’t require fancy equipment or culinary school training. What it needs is your willingness to embrace the process, some patience, and this straightforward guide that breaks everything down into manageable steps.
Your first brisket doesn’t have to be perfect—mine certainly wasn’t. But following these proven techniques will set you up for success, transforming what seems like a daunting task into an achievement you’ll want to repeat again and again.
Understanding What Makes Brisket Special
Before you dive into cooking, it helps to understand what you’re working with. Brisket comes from the breast section of cattle, a hardworking muscle that requires special treatment to become the tender, succulent meat you’re after.
This cut contains substantial connective tissue and collagen throughout. When exposed to low, steady heat over several hours, that tough collagen breaks down into rich gelatin, creating the melt-in-your-mouth texture that makes brisket so extraordinary. Rush this process with high heat, and you’ll end up with something resembling shoe leather instead of dinner.
You’ll encounter two main types at the butcher counter: the point cut and the flat cut. The point contains more fat and marbling, making it incredibly forgiving for newcomers. The flat offers a more uniform shape with less fat, which means easier slicing but less margin for error. For your first attempt, either works beautifully—just know that the fattier point cut gives you a bit more breathing room.
Gathering Your Tools and Ingredients
Your equipment needs are refreshingly simple. You’ll want a sturdy roasting pan—either a traditional metal one or even a disposable aluminum version will work. A reliable meat thermometer ranks as your most critical tool; guessing temperatures leads to disappointment. Round out your arsenal with heavy-duty aluminum foil, a sharp carving knife, and you’re essentially set.
Your Essential Shopping List
For a standard 4-5 pound brisket, gather these ingredients:
The Basics:
- One beef brisket (point or flat cut)
- 2 tablespoons kosher salt
- 1 tablespoon coarsely ground black pepper
- 1 tablespoon garlic powder
- 1 tablespoon onion powder
- 2 teaspoons paprika (smoked varieties add depth)
- 2 cups beef broth
- 2 large onions, quartered
- 6-8 whole garlic cloves
Optional Flavor Boosters:
- 1 teaspoon liquid smoke for that authentic taste
- 1 tablespoon brown sugar for caramelization
- Your favorite BBQ rub
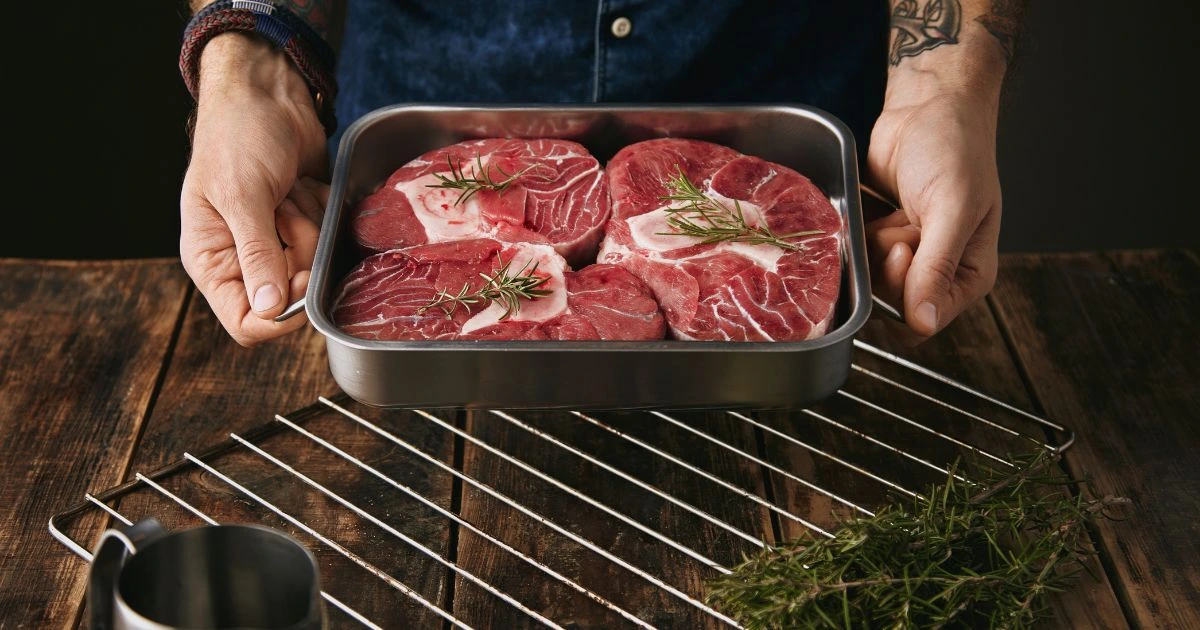
Look for brisket with visible marbling throughout and a fat cap measuring at least a quarter-inch thick. That fat serves as insurance against drying, continuously basting your meat throughout the lengthy cooking process.
Preparing Your Brisket for Success
Start by removing your brisket from the refrigerator about an hour before cooking begins. Bringing meat closer to room temperature ensures more even cooking throughout. While it sits, you can handle the trimming.
Excess fat needs to go, but don’t get overzealous. Leave that quarter-inch fat cap intact on one side—it’s your friend during the long cooking journey. Any hard, thick chunks of fat should be removed, as these won’t render properly. Also eliminate the silver skin, a tough membrane that refuses to break down regardless of cooking time.
Pat your brisket completely dry using paper towels. Moisture on the surface prevents your seasoning from adhering properly and interferes with that beautiful crust formation you’re aiming for.
Creating Your Flavor Foundation
The seasoning step separates merely edible brisket from something memorable. Mix your salt, pepper, garlic powder, onion powder, and paprika in a bowl until thoroughly combined. Some cooks add brown sugar for sweetness and enhanced caramelization, while others keep it traditional with just salt and pepper.
Apply your rub with confidence. Really press those seasonings into every surface of the meat—the top, bottom, and sides. Don’t be shy here. A generous coating creates that sought-after bark, the crusty exterior that provides textural contrast to the tender interior.
After seasoning, let your brisket rest for at least thirty minutes. This waiting period allows the salt to begin penetrating the meat while the spices adhere to the surface. If you’re planning ahead, season your brisket the night before and refrigerate it. Just remember to bring it back to room temperature before cooking.
The Low and Slow Method: How to Cook Brisket in Oven
Now comes the main event. Preheat your oven to 275°F—this temperature hits the sweet spot for collagen breakdown without drying out your meat. Position your oven rack in the lower third, ensuring even heat circulation.
Arrange your quartered onions and garlic cloves in the bottom of your roasting pan, creating a flavorful bed for your brisket. Pour your beef broth into the pan, keeping the liquid level below where your brisket will sit. If using a roasting rack, place it over the vegetables now.
Optional But Recommended: The Sear
While not absolutely necessary, searing your brisket before slow-cooking adds incredible depth of flavor. Heat a large skillet until smoking hot, then sear the fat side down for 3-4 minutes. Flip and sear each remaining side for about 2 minutes. This high-heat treatment triggers the Maillard reaction, creating complex flavors that develop throughout cooking.
The Cooking Process Broken Down
Phase One: Building the Bark (1 hour) Place your brisket fat-side up in the pan. Cook uncovered for the first hour, allowing the exterior to develop that prized crusty bark. The dry heat during this stage creates texture and concentrates flavors.
Phase Two: The Long Haul (4-6 hours) After an hour, remove your pan and wrap the brisket tightly in aluminum foil. Some cooks prefer covering the entire pan with foil instead—both methods work. The wrapping traps moisture, creating a self-basting environment while the meat continues cooking.
Return your wrapped brisket to the oven and settle in for the waiting game. This phase requires patience. Depending on your brisket’s size, you’re looking at 4-6 additional hours. A good rule of thumb: plan for approximately one hour per pound at 275°F.
Knowing When It’s Actually Done
Here’s where many beginners stumble. Your target internal temperature sits between 195-205°F, but temperature alone doesn’t tell the complete story. The true test involves inserting a probe or fork into the thickest section. When your brisket is genuinely ready, that probe should slide through like soft butter with virtually no resistance.
Start checking at the earlier end of your estimated cooking time, then every thirty minutes thereafter. Every oven behaves differently, and every piece of meat has its own personality. Don’t rush this part.
The Critical Resting Period
Once your thermometer reads 195-205°F and the probe test confirms tenderness, resist the urge to slice immediately. Resting ranks as crucial as the cooking itself.
Keep your brisket wrapped in foil and wrap it again with clean towels. Place this bundle in an empty cooler, which maintains heat without continuing to cook. Rest for a minimum of thirty minutes, though an hour or two yields even better results. During this time, juices redistribute throughout the meat while the temperature equalizes, guaranteeing moist, flavorful slices instead of a puddle of lost juices on your cutting board.
Slicing and Serving Your Masterpiece
Unwrap your rested brisket and examine the meat grain—those parallel muscle fibers running in one direction. Your knife must cut perpendicular to these fibers. Slicing with the grain leaves you with stringy, chewy pieces regardless of how perfectly you cooked it.
Use a sharp knife and make clean, smooth cuts approximately a quarter-inch thick. The flat and point sections have grain running in different directions, so you’ll need to adjust your cutting angle as you work through the meat.
Arrange your slices on a platter, perhaps with some of those softened onions from the pan scattered around. The cooking liquid, strained and with excess fat skimmed off, makes an outstanding au jus for serving alongside.
Pairing Suggestions That Complement Your Effort
Traditional accompaniments include creamy coleslaw, baked beans, cornbread, and tangy pickles. These sides balance the richness of your brisket while providing textural variety. Potato salad, mac and cheese, or roasted vegetables also pair beautifully.
For sauces, keep it simple. Your brisket should taste incredible on its own, but having options never hurts. Traditional BBQ sauce, horseradish cream, or that strained pan liquid give your guests choices without overwhelming the meat’s natural flavor.
Troubleshooting Common Issues
If your brisket turns out tough: You likely didn’t cook it long enough. Tough brisket means the collagen hasn’t fully broken down. Next time, cook to a higher temperature and test for that butter-like tenderness with your probe.
If it’s dry: Either your oven temperature ran too high, you cooked it too long past 205°F, or you didn’t leave enough fat cap for basting. Wrapping earlier in the process also helps maintain moisture.
If there’s no bark: You either wrapped too soon or the surface was too wet when seasoning. Cook uncovered for at least an hour and ensure your meat is completely dry before applying your rub.
Making It Work for Your Schedule
One of brisket’s hidden advantages: it actually improves when made ahead. Cook your brisket a day or two before serving, let it cool completely, then refrigerate it whole or in large pieces submerged in the cooking liquid. When you’re ready to serve, slice what you need and reheat gently in a covered dish with some added broth at 325°F for 20-30 minutes.
This make-ahead approach removes the time pressure from your event while allowing flavors to meld and deepen overnight.
Your Path Forward
Learning how to cook brisket in oven opens up a world of possibilities for your home cooking repertoire. This isn’t about perfection on your first attempt—it’s about understanding the principles and improving with each effort. The low and slow method at 275°F, proper seasoning, adequate resting, and slicing against the grain form the foundation of your success.
Every brisket teaches you something new about reading meat, managing time, and adjusting to your particular oven’s quirks. Soon you’ll develop an intuition for when it’s ready, how much seasoning works for your taste, and which variations excite your family most.
Ready to start your brisket journey? Grab that cut of beef you’ve been eyeing, clear your weekend schedule, and commit to the process. Take photos of your results, note what worked and what didn’t, and don’t hesitate to experiment with different rubs and seasonings once you’ve mastered the basics. Share your experience in the comments below—what surprised you most about cooking your first brisket? What questions do you still have? Your fellow home cooks want to hear about your victories and learn from your challenges. Let’s build a community of confident brisket makers together, one perfectly cooked piece of meat at a time.