Homemade Beef Gravy – Learn simple methods to make rich, flavorful beef gravy from scratch at home.
Table of Contents
Homemade Beef Gravy: The Ultimate Guide to Rich, Restaurant-Quality Sauce in Your Kitchen
Picture this: Steam rises from a perfectly roasted beef, its juices pooling on the cutting board. Your mashed potatoes sit waiting, naked and lonely. Then comes that moment—the warm cascade of silky, brown homemade beef gravy transforming everything it touches. This isn’t just sauce; it’s the difference between a meal and a memory.
You’ve probably stood in your kitchen, whisk in hand, wondering why your gravy never quite matches what restaurants serve. Maybe you’ve battled lumps, wrestled with watery consistency, or settled for those artificial packets hiding in your pantry. Here’s what nobody tells you: making exceptional beef gravy from scratch requires nothing more than understanding three simple elements and a bit of confidence.
Why Homemade Beef Gravy Changes Everything
Walk down any supermarket aisle and you’ll find rows of gravy packets, jars, and instant mixes promising restaurant quality in minutes. Don’t believe the hype. Those convenient options carry a hidden cost beyond their price tags.
Store-bought varieties pack an astronomical amount of sodium—sometimes exceeding 400mg per serving, nearly 20% of your daily limit. They’re loaded with preservatives, artificial flavoring, and ingredients you can’t pronounce. Meanwhile, your homemade version contains exactly what you put in: real beef drippings, quality stock, and seasonings you control.
The cost difference might surprise you. That fancy jar of prepared gravy runs about $4 for roughly two cups. Your homemade batch? Less than $2, especially when you’re using drippings you’d otherwise discard. Over a year of Sunday dinners, that’s real money back in your pocket.
But beyond finances and nutrition lies something deeper—the pride of mastering a foundational cooking skill your grandmother knew by heart. Once you nail this technique, you’ll carry it forever.
Understanding the Three Essential Components
Every stellar beef gravy starts with the same trinity of ingredients. Miss one, and you’re fighting an uphill battle.
Fat forms your foundation. Pan drippings from roasted beef deliver unmatched flavor, but butter works beautifully when drippings aren’t available. This fat does more than add richness—it’s the vehicle that carries all those savory notes throughout your gravy. You need roughly ¼ cup for every two cups of finished sauce.
Flour acts as your thickening agent. When combined with fat and heated, flour creates what French cooks call a roux—the backbone of countless sauces. All-purpose flour works perfectly, though cornstarch and arrowroot offer gluten-free alternatives. The key lies in the ratio: equal parts fat to flour creates medium-thick gravy that coats beautifully without becoming paste.
Liquid brings everything together. Beef stock or broth forms the body of your gravy. Quality matters enormously here. Low-sodium varieties from the store work fine, but homemade stock elevates your gravy into another realm entirely. You’ll need about two cups of liquid for that ¼ cup of fat and flour.
The Science Behind Silky Smooth Texture
Understanding why gravy works helps you troubleshoot when things go sideways. When you combine flour with hot fat and cook them together, you’re coating individual flour particles in fat. This prevents them from clumping when liquid hits them—the primary cause of lumpy gravy.
Temperature plays a crucial role. Rush this process with high heat, and you’ll burn your roux, creating bitter flavors that ruin the entire batch. Too low, and your flour won’t cook properly, leaving a raw, pasty taste.
The magic happens at medium heat with constant attention. Your roux should bubble gently while you whisk, developing nutty aromas and deepening in color from blonde to golden to rich brown, depending on your preference.
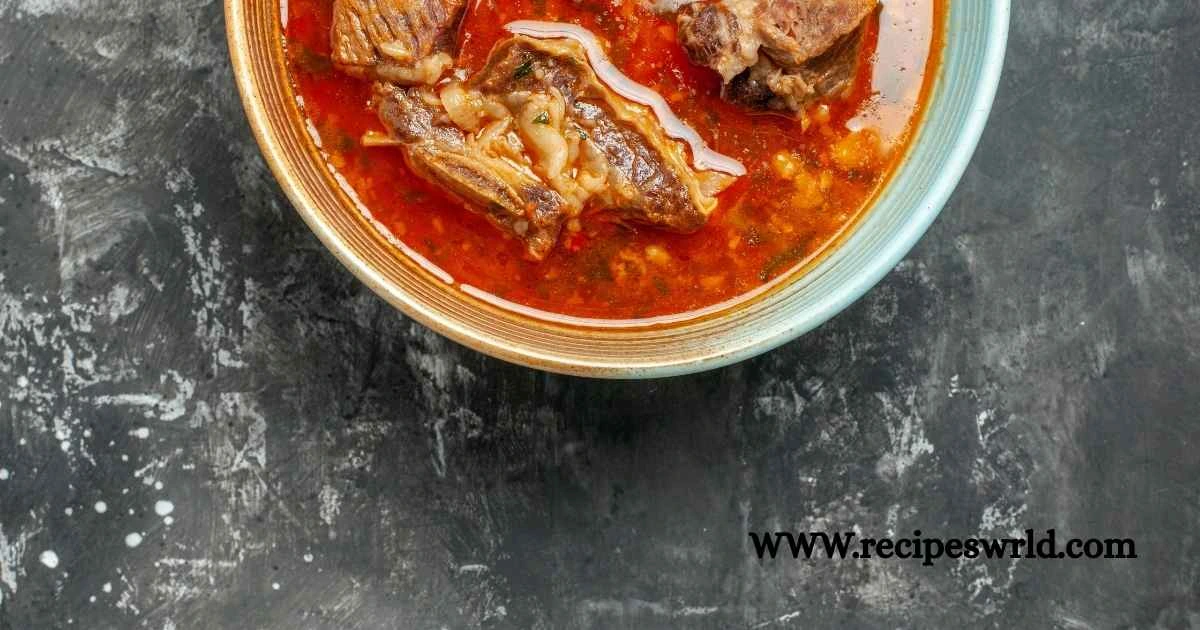
Classic Homemade Beef Gravy From Pan Drippings
Let’s walk through the method that delivers consistently excellent results every single time.
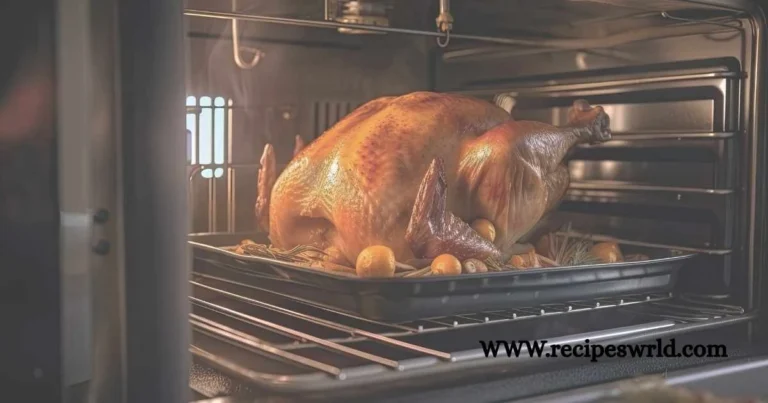
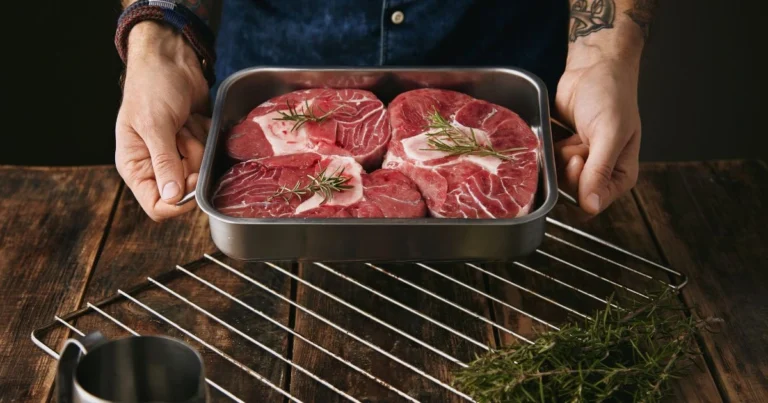
After removing your roast from the pan, you’ll notice those beautiful browned bits stuck to the bottom and precious drippings pooled in the pan. Don’t you dare wash that pan yet—it’s liquid gold.
Pour the drippings into a measuring cup and let them settle for a minute. The fat will rise to the top while any watery juices sink below. You want to keep both, but knowing which is which helps you control consistency.
Return your roasting pan to medium heat on the stovetop. Add back ¼ cup of those drippings (or supplement with butter if you’re short). Sprinkle in ¼ cup of flour and immediately start whisking. You’re looking for a smooth paste that bubbles steadily.
Cook this roux for about two minutes, scraping up all those flavorful brown bits from the pan bottom. This step—called deglazing when you add liquid—captures every ounce of flavor your roast created.
Now comes the critical moment. Grab your whisk with authority and start adding beef stock gradually. Pour in about half a cup while whisking constantly. The mixture will seize up at first—don’t panic. Keep whisking and adding liquid in splashes until you’ve incorporated all two cups.
The gravy will thin considerably, then begin thickening as it heats. Let it simmer gently for five to ten minutes, whisking occasionally. You’ll notice it coating your spoon more heavily with each passing minute.
Season carefully with salt and black pepper, tasting as you go. Remember, you can always add more seasoning, but you can’t take it back.
Simple Beef Gravy Without Drippings
Your Tuesday meatloaf deserves amazing gravy too, even without a roasting pan full of drippings. This streamlined method delivers rich, savory results using pantry staples.
Melt four tablespoons of butter in a saucepan over medium heat. Add four tablespoons of flour and whisk until smooth. Cook this roux for two to three minutes, watching it turn golden brown.
Here’s where you’ll boost flavor to compensate for missing drippings. Before adding your beef stock, stir in half a teaspoon of onion powder and a quarter teaspoon of garlic powder. These aromatics bloom in the hot roux, releasing their essential oils.
Now slowly whisk in two and a half cups of quality beef stock. The extra half cup accounts for the moisture you’d normally get from pan drippings.
Add one teaspoon of soy sauce—this might seem odd, but it delivers umami depth that mimics the savory notes from roasted meat. A few drops of Worcestershire sauce amplifies this effect.
Simmer for eight to ten minutes until thickened to your liking, then season with black pepper. Taste before adding salt, as the soy sauce brings plenty of saltiness already.
Troubleshooting Common Problems
Even experienced cooks encounter gravy mishaps. Here’s how to rescue your sauce when things go wrong.
Lumps happen when flour meets liquid too quickly without enough agitation. Prevention beats cure—always whisk vigorously while adding liquid. But if you spot lumps forming, don’t despair. Pour your gravy through a fine-mesh strainer into a clean pot, pressing the liquid through with a spoon. Alternatively, an immersion blender makes quick work of any lumps.
Thin, watery gravy lacks enough thickening agent or hasn’t simmered long enough. Create a slurry by mixing one tablespoon of flour with two tablespoons of cold water in a small bowl until smooth. Whisk this into your simmering gravy and cook for another five minutes. The flour will activate and thicken your sauce. Repeat if needed.
Overly thick gravy contains too much thickener or has reduced too far. Warm some additional beef stock and whisk it in gradually until you reach the perfect consistency. Always use warm liquid to avoid temperature shock that creates lumps.
Greasy gravy means you’ve used too much fat or haven’t properly separated drippings. Let your gravy rest for a minute off heat. Fat will rise to the surface where you can skim it off with a spoon. Next time, measure your drippings more carefully.
Elevating Your Gravy With Variations
Once you’ve mastered the basic technique, flavor variations become your playground.
Mushroom beef gravy adds earthy depth that pairs beautifully with steak. Sauté eight ounces of sliced mushrooms in your pan before making the roux. Button mushrooms work fine, but cremini or a mix with shiitakes creates complexity. Let the mushrooms release their moisture and brown slightly before proceeding with your standard method.
Red wine gravy brings sophisticated richness perfect for special occasions. After creating your roux, add half a cup of dry red wine before the stock. Let it bubble and reduce for two minutes—this cooks off the alcohol while concentrating the wine’s flavor. Then continue with stock as usual. Cabernet Sauvignon or Merlot work beautifully here.
Herb-infused versions shine during holiday meals. Drop a sprig of fresh thyme and rosemary into your gravy as it simmers. The gentle heat extracts their essential oils without overwhelming the beef flavor. Remove the herbs before serving. Fresh herbs matter here—dried versions won’t give the same bright notes.
Storage and Make-Ahead Strategies
Homemade beef gravy stores beautifully, making it perfect for meal prep and holiday planning.
Refrigerate cooled gravy in an airtight container for up to four days. As it chills, the fat will solidify on top, creating a natural seal that actually preserves freshness. Simply remove this fat cap when reheating, or stir it back in if you want the richness.
Freezing extends your timeline to three months. Pour cooled gravy into freezer bags, removing as much air as possible. Lay them flat in your freezer for space-efficient storage. Label clearly with the date and contents.
Reheating requires gentle heat to preserve texture. Thaw frozen gravy overnight in your refrigerator, then warm it slowly in a saucepan over medium-low heat, whisking frequently. You might need to whisk in a splash of warm stock to restore the original consistency, as gravy thickens during storage.
Your Next Steps to Gravy Mastery
You now hold the knowledge that separates mediocre gravy from the spectacular sauce that makes people ask for seconds. The techniques you’ve learned here apply to countless other dishes—this same roux method forms the base of French mother sauces, cheese sauces, and cream gravies.
Start simple. Make a basic batch following the classic method this weekend. Notice how the roux smells as it cooks, how the liquid incorporates, how the thickness develops. These sensory markers will guide you better than any written recipe once you’ve experienced them firsthand.
Then experiment. Try the mushroom variation next time you make steak. Add a splash of wine to your holiday roast gravy. Each batch teaches you something new about balancing flavors and adjusting consistency by feel rather than rigid measurement.
Your family will notice the difference immediately. That first bite, when rich homemade beef gravy mingles with fluffy mashed potatoes or tender roast beef—that’s when you’ll understand why this skill matters.
Stop settling for packets and jars that never quite deliver on their promises. Your whisk is waiting. Your stock is ready. That beautiful roast needs the finishing touch only you can provide. Make your next meal unforgettable with gravy that comes from your hands, your kitchen, and your newfound confidence.
Now get cooking—your best beef gravy yet is just twenty minutes away.