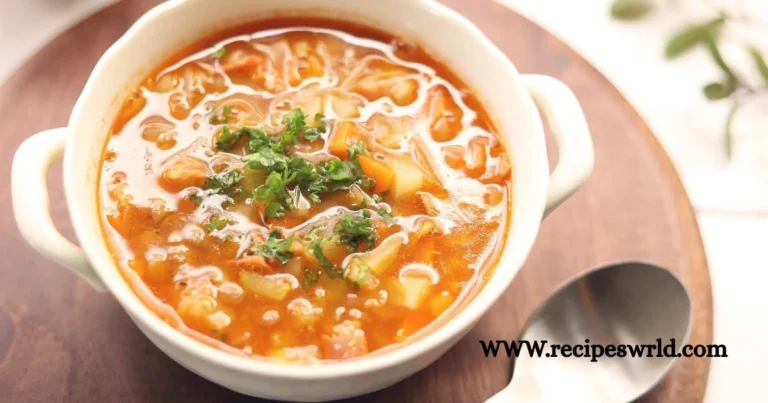

Deer stew : find basic tips and ingredients for a hearty venison stew
Table of Contents
Deer Stew: The Ultimate Guide to Making Hearty, Soul-Warming Venison Stew
Picture this: A cold evening, snow falling gently outside your window, and the unmistakable aroma of slowly simmered venison filling every corner of your home. That first spoonful of deer stew carries something special—a deep, earthy richness that speaks to tradition, patience, and the satisfaction of transforming wild game into pure comfort. Whether you’ve just returned from a successful hunting trip or you’re exploring venison for the first time, mastering this classic dish opens doors to flavors most people never experience. This guide walks you through everything needed to create a deer stew that’ll have everyone asking for seconds.
Why Deer Stew Deserves a Place in Your Kitchen
The Benefits of Cooking with Venison
You’re probably wondering what makes venison worth the effort. The answer lies in both nutrition and taste. Wild deer meat packs an impressive nutritional punch—it contains roughly 26 grams of protein per 3-ounce serving while keeping fat content remarkably low at just 3 grams. Compare that to beef, which typically carries three times the fat content. Your body also gets a significant dose of iron, zinc, and B vitamins, making this stew as nourishing as it is delicious.
Beyond nutrition, there’s the ethical angle. When you choose venison from ethical hunting or sustainable sources, you’re supporting wildlife management and consuming meat that lived freely until harvest. No feedlots, no antibiotics, no growth hormones—just pure, natural protein that grazed wild landscapes.
The flavor profile sets venison apart too. That distinctive taste—often described as earthy, slightly sweet, and robust—transforms ordinary stew into something memorable. Slow cooking mellows any intensity while developing layers of complexity that beef simply can’t match.
What Makes Deer Stew Special
Deer stew isn’t just another meat-and-potatoes dish. The magic happens during those long, slow cooking hours when tough connective tissue breaks down into silky gelatin, creating a broth that coats your spoon with rich, savory goodness. This isn’t fast food—it’s slow food at its finest, requiring patience but rewarding you with tender chunks of meat that practically dissolve on your tongue.
The dish also freezes beautifully, making it perfect for meal prep. Cook once, eat for weeks. Many enthusiasts swear the flavors actually improve after a day or two in the refrigerator as everything melds together.
Essential Ingredients for the Perfect Deer Stew
Choosing the Right Cut of Venison
Your success starts with selecting appropriate cuts. Forget the tenderloin or backstrap—save those for quick-searing methods. For stew, you want the shoulders, neck, shanks, or bottom round. These tougher cuts contain collagen that transforms into gelatin during extended cooking, giving your stew body and richness.
Fresh venison works wonderfully, but don’t stress if yours has been frozen. Properly wrapped frozen venison maintains quality for up to a year. Just remember to thaw it slowly in your refrigerator over 24 hours before cooking.
Core Ingredients Every Deer Stew Needs
Building exceptional deer stew requires understanding how ingredients work together. Here’s your essential shopping list:
| Ingredient Category | Specific Items | Purpose |
|---|---|---|
| Protein | 2-3 lbs venison, cubed | Main ingredient |
| Aromatics | Onions, garlic, celery, carrots | Flavor foundation |
| Liquid | Beef broth, red wine, water | Cooking medium |
| Herbs & Spices | Bay leaves, thyme, rosemary, black pepper | Seasoning |
| Vegetables | Potatoes, carrots, parsnips, mushrooms | Heartiness & texture |
| Thickener | Flour, cornstarch, or tomato paste | Body & consistency |
| Fat | Bacon, olive oil, or butter | Richness & browning |
The aromatics—onions, garlic, celery, carrots—create your flavor base. They’re non-negotiable. The liquid you choose matters too. Beef broth adds depth, while red wine contributes acidity that balances the richness of the meat. Many cooks split the difference, using both.
Don’t underestimate herbs. Fresh thyme and rosemary complement venison beautifully, their woodsy notes harmonizing with the meat’s natural character. Bay leaves add subtle complexity that you’ll miss if you skip them.
Optional Ingredients to Elevate Your Deer Stew
Once you’ve mastered the basics, experimentation begins. Root vegetables like turnips, rutabaga, or sweet potatoes add different textures and flavors. Worcestershire sauce or soy sauce boost umami, making everything taste more “meaty.” Finishing with fresh parsley or a splash of cream right before serving brightens and enriches the final dish.
Regional variations abound. European-style versions might include juniper berries, while Southwestern interpretations lean toward chili peppers and cumin. Find your style through trial and error.
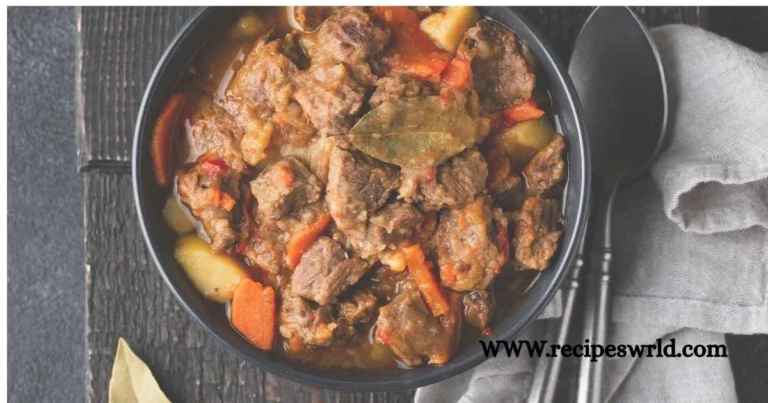
Step-by-Step Guide: How to Make Traditional Deer Stew
Preparation is Key
Success in stew-making begins long before heat meets pot. Start by trimming your venison meticulously. Remove every bit of silver skin—that shiny membrane doesn’t soften during cooking and creates chewy, unpleasant bites. Cut away any fat you find too. Unlike beef fat, deer fat has a lower melting point and can leave waxy residue that affects texture.
Cut your meat into uniform 1.5 to 2-inch cubes. Consistency matters because it ensures even cooking. Pat each piece completely dry with paper towels. This step separates good stew from great stew. Wet meat steams instead of browns, and browning develops the deep, caramelized flavors that make your stew irresistible.
The Cooking Process
Browning the Meat (Don’t Skip This!)
Heat your Dutch oven over medium-high heat with a couple tablespoons of oil. When it shimmers, add your first batch of venison. Notice the word “batch”—overcrowding the pan drops the temperature, causing steaming instead of searing. Work in batches, giving each piece space to develop that gorgeous golden-brown crust.
This browning process, called the Maillard reaction, creates hundreds of new flavor compounds. Those crusty brown bits stuck to your pot’s bottom? That’s concentrated flavor you’ll incorporate later. Give each side 3-4 minutes, resisting the urge to move the pieces around. Let them sit undisturbed until they release naturally from the pan.
Building Flavor Layers
Once all your meat is browned and set aside, reduce heat to medium. Add your diced onions, celery, and carrots to that same pot with its beautiful brown coating. Those vegetables will release moisture that helps scrape up the stuck-on bits. Cook them until softened and slightly golden, about 8-10 minutes.
Next comes garlic and tomato paste. The paste needs a minute or two to caramelize slightly, concentrating its flavor and eliminating any metallic taste. Your kitchen should smell amazing right now.
Now for the deglazing—pour in your red wine and use a wooden spoon to scrape every bit of brown goodness from the pot’s bottom. Let the wine simmer for about 5 minutes, reducing slightly while the alcohol cooks off.
Return your browned venison to the pot, add your broth, herbs, and any seasonings. Bring everything to a boil, then immediately reduce to the gentlest simmer you can manage. Cover your pot and maintain that barely-there bubble for the next 2 hours.
The Slow Cook
You’ve got options for cooking method. Stovetop works beautifully if you’re home to monitor occasionally. An oven set to 300°F provides even, surrounding heat that many cooks prefer. Slow cookers offer convenience—just transfer everything over and cook on low for 7-8 hours. Instant Pots speed things up with pressure cooking, delivering tender meat in 35-40 minutes.
Whichever method you choose, remember: low and slow wins the race. High heat toughens venison instead of tenderizing it.
Adding Vegetables at the Right Time
Timing your vegetable additions prevents mushy disasters. Onions, celery, and garlic go in early—they’re part of your flavor foundation. After about 90 minutes of simmering, add heartier vegetables like potatoes and carrots. They need time to soften but not so much that they disintegrate.
Save delicate additions like mushrooms, peas, or corn for the final 30 minutes. These cook quickly and maintain better texture with shorter exposure to heat.
Pro Tips for the Most Tender Deer Stew
Combating Gamey Flavor
That intense “gamey” taste some people describe usually comes from improper handling in the field or incomplete trimming. Your first defense is meticulous fat removal—venison fat carries most of the strong flavors. Every white bit should go.
If you’re concerned about intensity, try soaking your cubed meat in milk or buttermilk for 4-24 hours before cooking. The lactic acid helps neutralize strong flavors while the liquid draws out blood that can contribute to gaminess.
Adding bacon works wonders too. The pork fat seasons the venison while balancing its leanness, and the smoky flavor complements rather than masks the wild meat taste.
Achieving Melt-in-Your-Mouth Texture
Temperature control determines texture. You want that gentle simmer where a few bubbles lazily break the surface every few seconds. A rolling boil turns meat tough and dry, no matter how long you cook it.
Test tenderness after 2.5 hours by fishing out a chunk and trying to pull it apart with a fork. It should yield easily, almost falling apart on its own. Not there yet? Keep cooking and checking every 30 minutes. Venison varies—older animals need more time than younger ones.
Thickening Your Deer Stew Properly
Several approaches work for achieving that perfect consistency. The easiest is coating your meat in flour before browning. The flour browns along with the meat, thickening the liquid as it cooks and adding subtle nutty flavors.
Prefer to thicken at the end? Mix 2 tablespoons of cornstarch with 2 tablespoons of cold water until smooth, then stir it into your simmering stew. Give it 5 minutes to activate and thicken while stirring occasionally.
Another option: simply remove the lid during the last 30 minutes of cooking, letting excess liquid evaporate naturally. This concentrates flavors while thickening your broth.
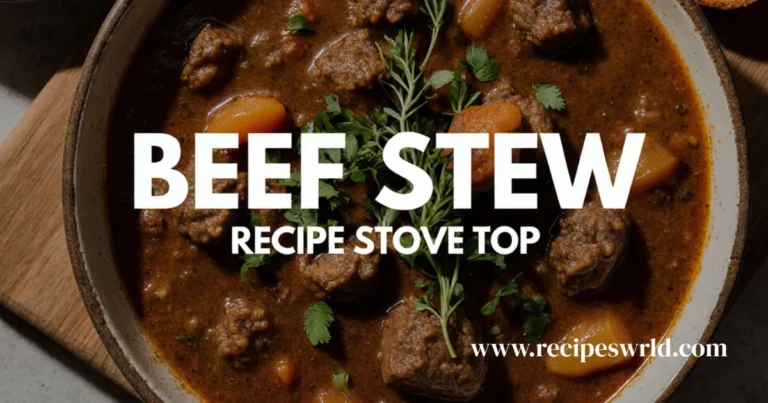
Classic Deer Stew Recipe
Complete Ingredient List
| Ingredient | Amount | Notes |
|---|---|---|
| Venison (cubed) | 2.5 lbs | Shoulder or neck preferred |
| Bacon | 4 strips, chopped | Adds richness |
| All-purpose flour | 1/3 cup | For dredging |
| Olive oil | 2 tbsp | As needed |
| Yellow onions | 2 large, diced | |
| Carrots | 4 large, cut into chunks | |
| Celery stalks | 3, chopped | |
| Garlic cloves | 6, minced | |
| Tomato paste | 3 tbsp | Umami boost |
| Red wine | 1.5 cups | Cabernet or merlot |
| Beef broth | 4 cups | Low-sodium preferred |
| Potatoes | 1.5 lbs, cubed | Yukon gold or russet |
| Bay leaves | 3 | Remove before serving |
| Fresh thyme | 4 sprigs | |
| Fresh rosemary | 2 sprigs | |
| Worcestershire sauce | 2 tbsp | |
| Salt & pepper | To taste | Season throughout |
| Fresh parsley | 1/4 cup, chopped | For garnish |
Cooking Instructions
Start by getting your venison ready—pat it completely dry, season generously with salt and pepper, then dredge each piece lightly in flour. Heat your Dutch oven over medium-high heat and cook your chopped bacon until crispy. Remove the bacon and set it aside, leaving that flavorful fat behind.
Brown your venison in batches in that bacon fat, working carefully not to crowd the pan. Each batch needs 3-4 minutes per side to develop a deep golden crust. Set the browned meat aside with your bacon.
Lower your heat to medium and add onions, carrots, and celery. Cook these aromatics until they’ve softened and picked up some color, about 8-10 minutes. Stir in your minced garlic and tomato paste, cooking for another 2 minutes until everything smells incredible.
Pour in your red wine and scrape up all those flavorful brown bits from the pot’s bottom. Let the wine simmer for 5 minutes, reducing slightly. Now return your venison and bacon to the pot, add your beef broth, herbs, and Worcestershire sauce. Bring everything to a boil, then immediately reduce to a gentle simmer.
Cover your pot and let it work its magic for 2 hours, checking occasionally to ensure it’s maintaining that bare simmer. After 2 hours, add your cubed potatoes and continue cooking for another 45-60 minutes until both meat and potatoes are fork-tender.
Before serving, fish out your herb sprigs and bay leaves. Taste and adjust your seasoning with salt and pepper as needed. Let the stew rest for 10 minutes off the heat—this allows temperatures to equalize and flavors to settle. Garnish each bowl with fresh chopped parsley and serve with crusty bread for soaking up that incredible broth.
Yield: 8-10 servings | Total time: 3.5 hours
Serving Suggestions and Storage
What to Serve with Deer Stew
Crusty sourdough bread stands as the classic accompaniment—perfect for mopping up every last drop of broth. Buttermilk biscuits work beautifully too, their tender crumb soaking up liquid while adding buttery richness.
For something heartier, serve your stew over creamy mashed potatoes or buttered egg noodles. A simple green salad with sharp vinaigrette cuts through the richness nicely, providing refreshing contrast.
Wine pairings? Stay with bold reds—Cabernet Sauvignon, Syrah, or Malbec all complement the robust flavors. Beer drinkers should reach for dark stouts or porters.
Storage and Reheating
Your deer stew stores beautifully in the refrigerator for 3-4 days in an airtight container. For longer storage, freeze portions in freezer-safe containers for up to 3 months. Leave about an inch of headspace since the liquid expands when frozen.
Reheat gently on your stovetop over low heat, stirring occasionally and adding a splash of broth if it’s thickened too much. Many cooks insist their stew tastes even better the next day after flavors have had time to marry together overnight.
Your Journey Starts Now
Creating perfect deer stew isn’t complicated—it just requires patience, attention to detail, and respect for quality ingredients. You’ve got the knowledge now. The browning technique that builds flavor, the gentle simmer that ensures tenderness, the proper timing for adding vegetables—all these elements combine into a dish that transcends ordinary weeknight dinners.
Your first batch might not be perfect, and that’s fine. Each pot teaches something new about how your particular venison responds, how your stove maintains temperature, what flavor combinations excite your palate. Don’t hesitate to experiment once you’ve mastered the basics.
The real reward comes when you ladle that first steaming bowl, watching steam rise as you carry it to the table. That moment when your first taste confirms all those hours were worth it—that’s when you understand why deer stew has remained a cold-weather staple for generations.
So grab that venison from your freezer or make a trip to your local butcher. Clear your afternoon, put on some music, and lose yourself in the meditative process of creating something nourishing and delicious. Your kitchen will thank you with aromas that make your house feel like home, and your table will fill with people drawn by the promise of comfort in a bowl.
Ready to start cooking? Share your deer stew results with us in the comments below, and don’t forget to tag your fellow hunters who need to see this guide!